Having a reliable security system is essential for protecting your home and family. Installing an Arlo camera can be an excellent choice, as they offer wireless, high-definition cameras that are easy to install. This article will walk you through the step-by-step process of manually installing an Arlo camera in your home. We will provide detailed instructions on connecting to the internet, mounting the camera securely, and syncing up with the Arlo app.
Step 1: Determine the Type of Camera
Determining the Type of Camera is an essential part of setting
up your Arlo camera system. The right type of camera can make the difference
between a successful security system and one that fails to meet expectations.
Many Arlo cameras are available, so it’s important to know what features you need before committing to a specific model.
There are several considerations when selecting the correct type of camera for your Arlo setups, such as weatherproofing, motion detection capabilities, video resolution, and storage capacity. A primary indoor or outdoor Wi-Fi-connected Arlo camera may be adequate if you’re looking for a direct home security setup. But you require more sophisticated surveillance capabilities. Consider options such as night vision or Pan/Tilt/Zoom (PTZ) models with advanced motion detection sensors and cloud storage solutions.
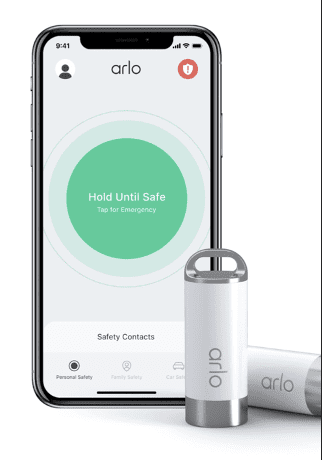
Step 2: Download Software
The second step in setting up your Arlo camera is downloading the software.
Downloading the software is essential to the setup process and allows
you to access your camera’s features.
To start, ensure you have an internet connection and head to arlo.netgear.com/downloads to get the Arlo app for either iOS or Android devices. Once you’ve downloaded the Arlo app, open it up, sign in with your account information, or create a new account if necessary. You’ll be prompted to add a device during this process, so select “Add a Camera” from the menu bar and follow the directions on-screen until it says that your device has been successfully added. Now, you can access your camera’s features, including live-streaming video, motion detection alerts, recording ability, and more!
Step 3: Arlo camera to the network.
The first thing to do when connecting your Arlo Camera is to download the free mobile app. Once downloaded, you can use it to set up your Arlo camera on the network. You can also access live video feeds directly from the app, giving you complete control over your security system. Additionally, features like two-way audio and motion detection are included with many of their models, giving you more flexibility in monitoring and responding to events at home or away from home.
Step 4: Set Up and Mount the Camera
his installation process involves setting up and mounting the camera. With just a few simple tools, you can have your Arlo camera up and running in no time!
The first thing is to collect all the necessary materials for the installation. You’ll need a drill with bits, screws, a mounting bracket, and an electrical outlet for powering your Arlo camera. Once you have all of these items, it’s time to start setting up your camera.
The next step is to attach the mounting bracket to your wall or ceiling. Measure twice before drilling, so there are no mistakes! After securely attaching the frame, it’s time to connect your Arlo Camera. Place it on top of the mount and secure it with screws provided by Arlo. Also Visit: my arlo login.
Step 5: Test Connectivity
Test connectivity is the fifth and final step in setting up your Arlo camera. This ensures that the camera can properly
connect with your home network and send video data back to you. After
clicking the camera to power, downloading the app, and registering an account,
it’s time to ensure everything works well together.
To begin testing, open up the Arlo app on your device and select “Add Device” from the main menu. Next, follow the on-screen instructions for scanning a QR code or entering a serial number. Once complete, you will be prompted to enter your home Wi-Fi password so the camera can connect. After that has been entered successfully, you should receive a notification confirming the successful pairing of both devices.
Step 6: Ready to Monitor Home
Arlo cameras can significantly increase your home security and keep an eye on things when you’re away. However, it can be challenging to know how to do this. That’s why we’ve put together this article – to help you understand the process of manually installing an Arlo camera.
In conclusion, setting up an Arlo camera is a straightforward process that can be completed in minutes. The mobile app and desktop site provide clear instructions, and arlo customer service is available to answer any questions. Furthermore, the Arlo system lets users know their home or business is being monitored with the latest technology. With its simple setup, fast response times, and powerful features, it’s no wonder why Arlo has become one of the most trusted security systems on the market today.


